
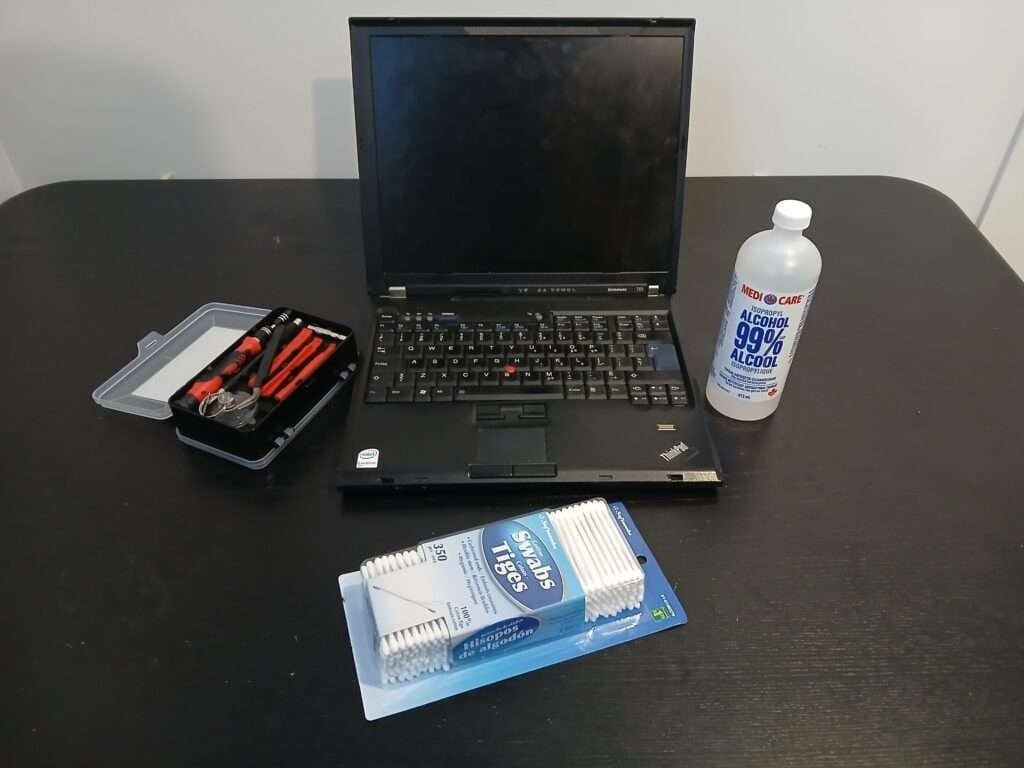
Tools needed for disassembly
Laptops
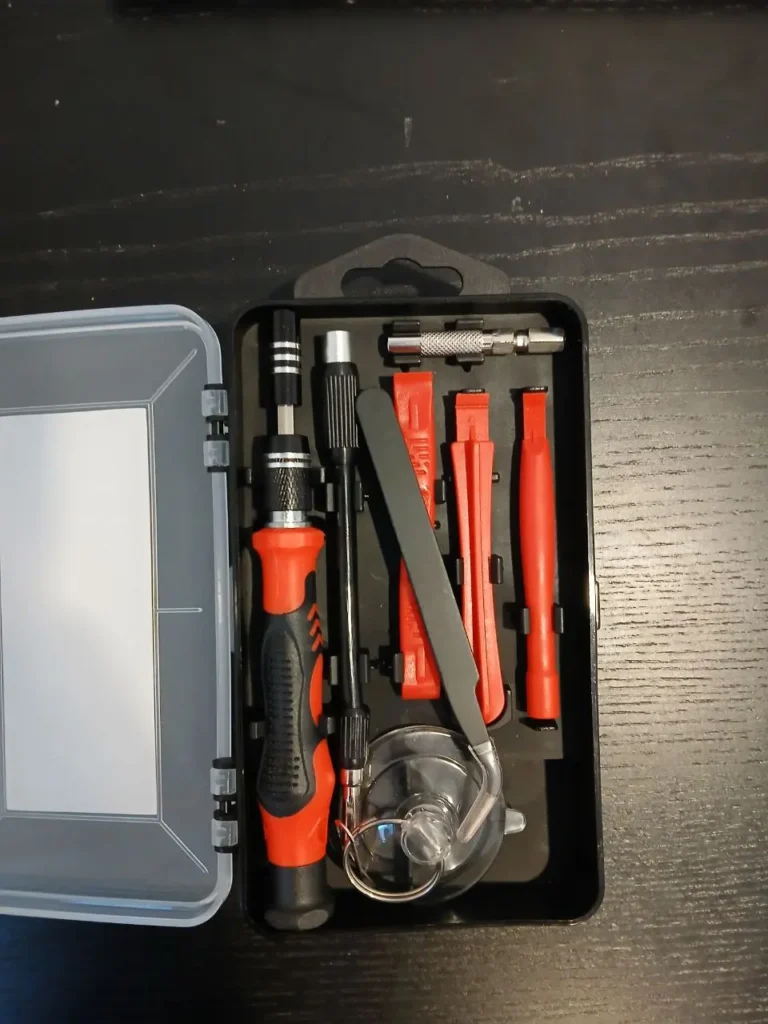
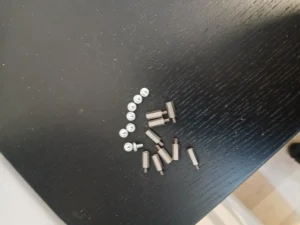
A small screwdriver kit like the one in the picture.
This kit will be extremely useful to disassemble small screws and parts.
Make sure that your kit has a plastic pry bar.
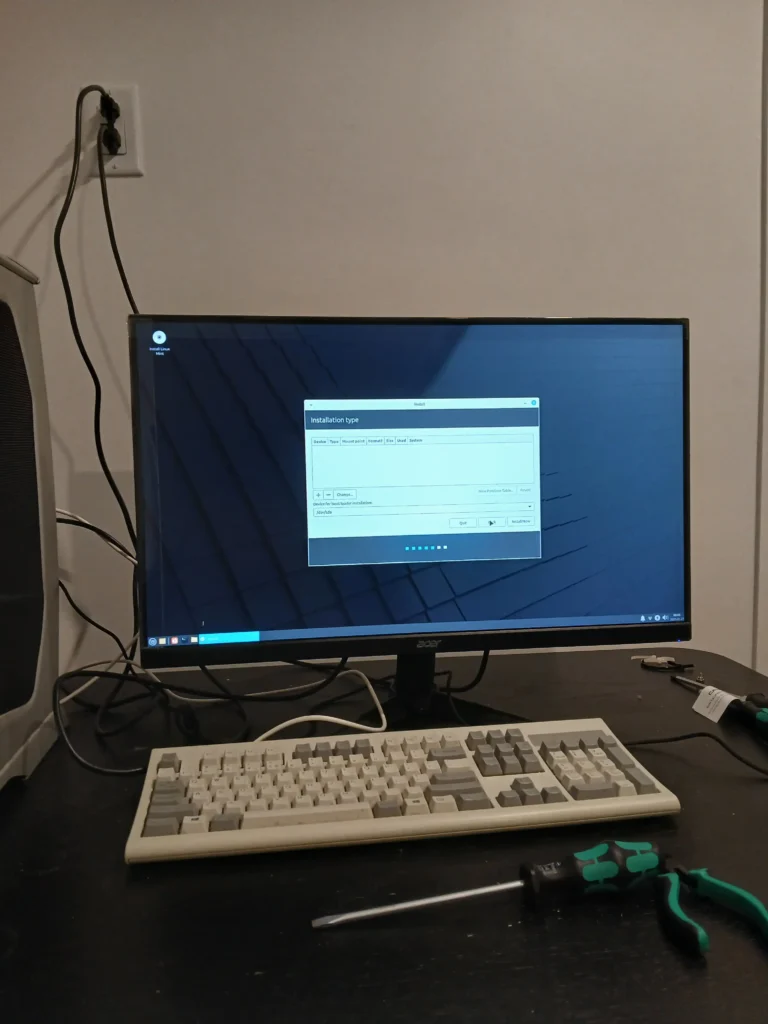
Desktop PC
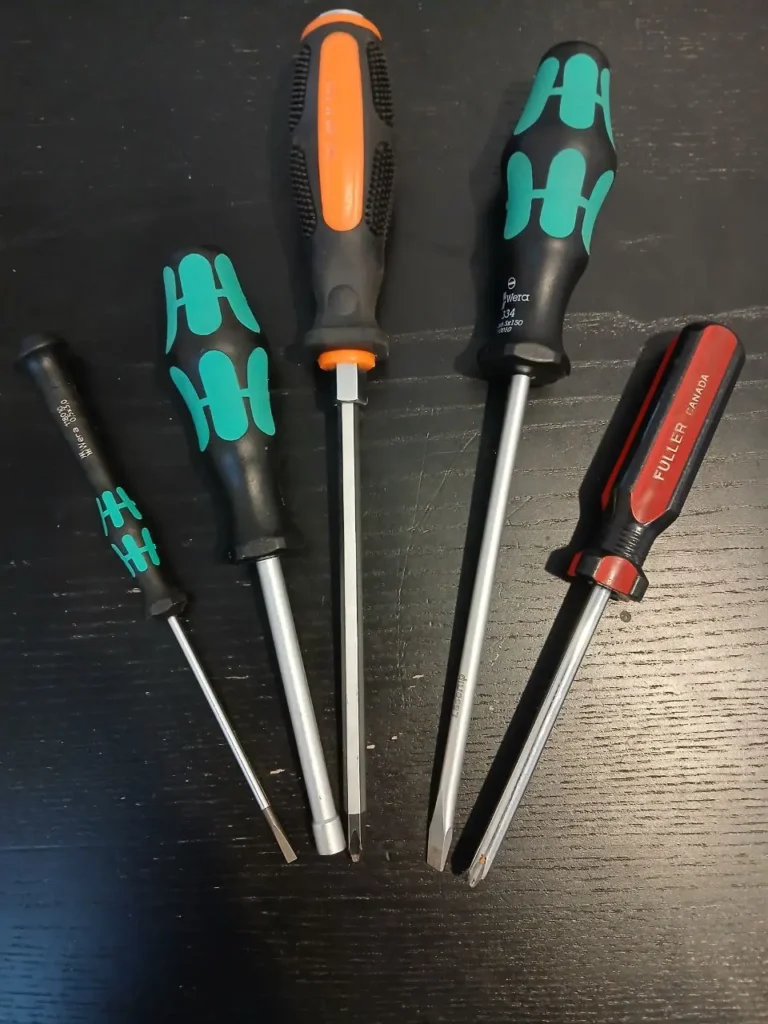
A small and big screwdriver kit, depending on the screw, you might require both.
Always try to use magnetics screwdrivers, it will save you time and headaches.
If you plan on cleaning the computer, you will need a compress air can a brush or a battery powered fan.

- Value 2-PACK – Made in the USA, Non-toxic & no bitternt, NO nasty smells or residue left on the surface.
- Prolongs the life of your valuables & sensitive electronic equipment, Stops the build-up of dust in your electronics, Ke…
- Blow Off cleans dust with a steady stream of sterilized air, an essential cleaning tool for all your expensive equipment…
Laptops disassembly
Tips to follow before disassembly
First, make sure to have a clean space, and proper tools. If you pry open any plastic parts, make sure you use a plastic pry bar. Never use a metal screwdriver to pry open anything, it will damage the casing.
Secondly, always try to use a magnetic screwdriver if you can, it will really help you put the screw at the right place.
Thirdly, if you pull on any connector, be extremely careful, especially with new laptops. The micro connections can get damaged easily. If you are not sure on how to release a connector, always search on YouTube or Google for proper disassembly instructions.
Always wear clothes that doesn’t conduct static electricity, One discharge can kill a computer.
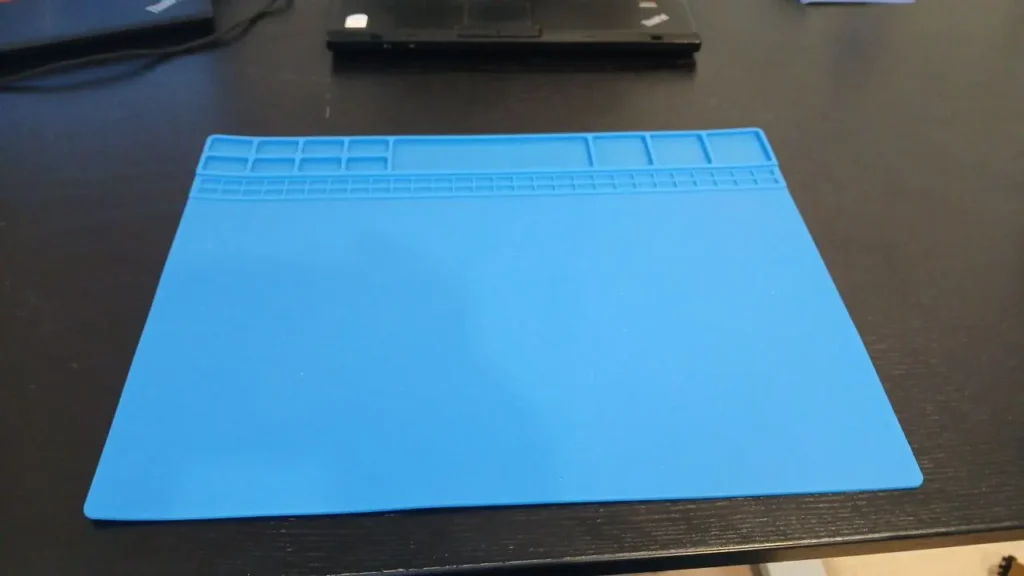
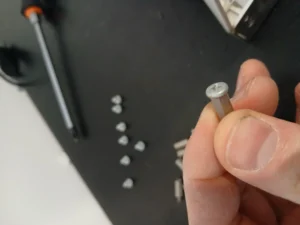
To make it easier on yourself when removing screws, you can organize them using a sheet of paper, or leave them with the disassembled part. You can also use a screw organizer mat like recommended in the first chapter. You can also take pictures and videos if you are not sure to remember everything.
Disconnecting the Power Source
First and foremost, disconnect all source of power. Remove the battery, disconnect the cable from the wall. You can even press 30 seconds on the power button to make sure that all the electricity is release from the motherboard.
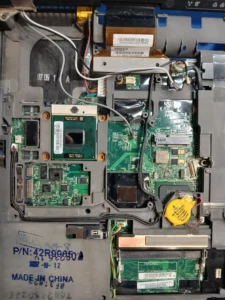
Removing the casing
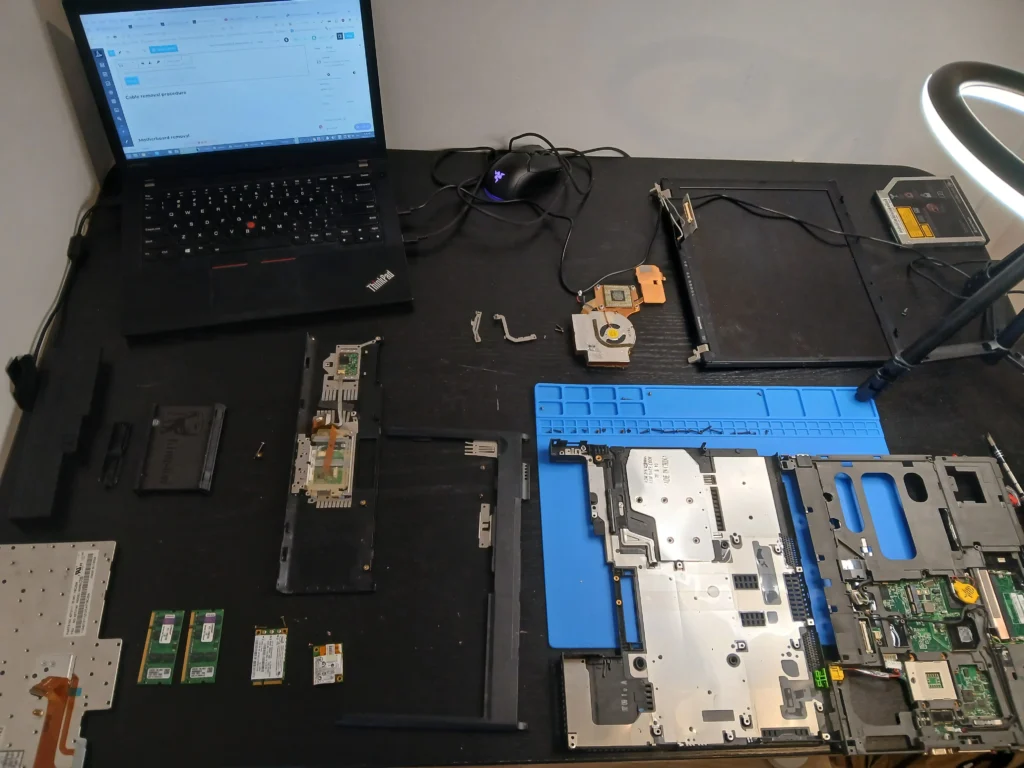
Before removing the casing, make sure you have a way to organize the screws and know where each one goes. I will be using a mat like in the pictures below.
Remove all screws under the casing.
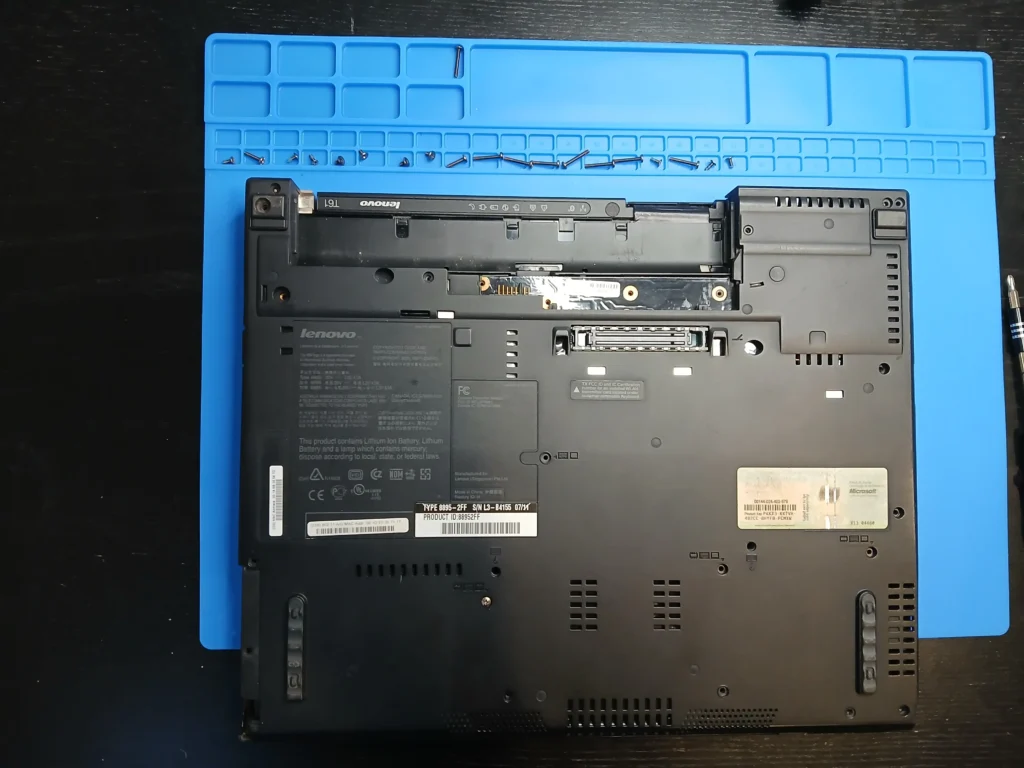
I removed the screws from left to right, up to down. When I will reassemble everything, I will use the same method.
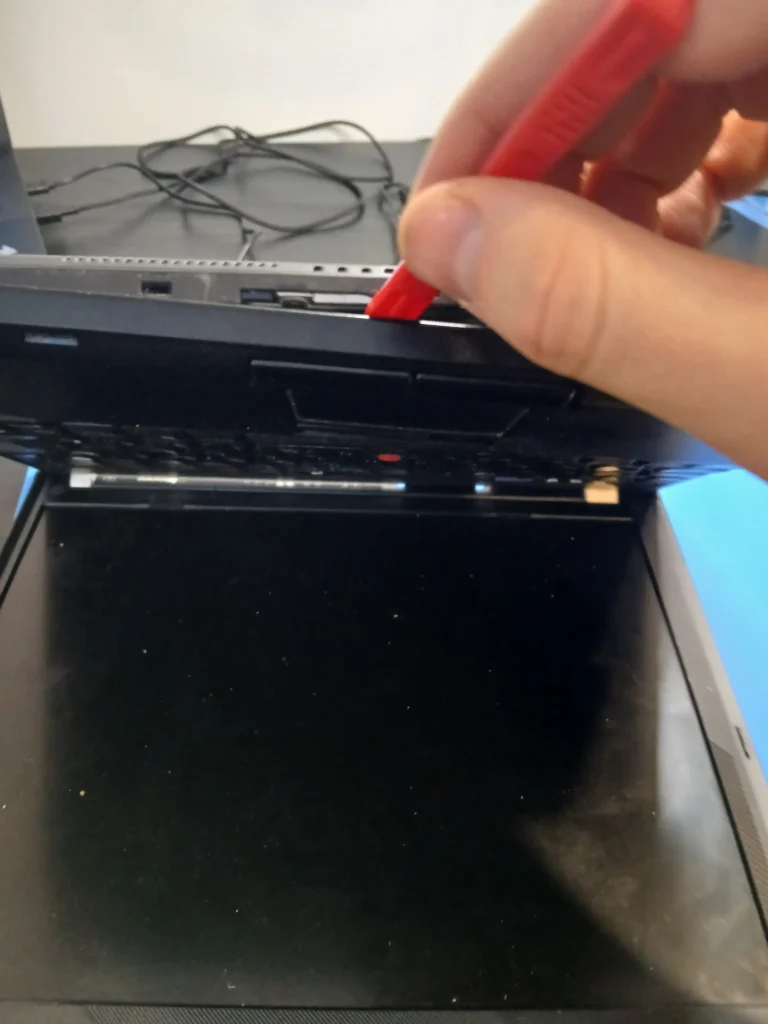
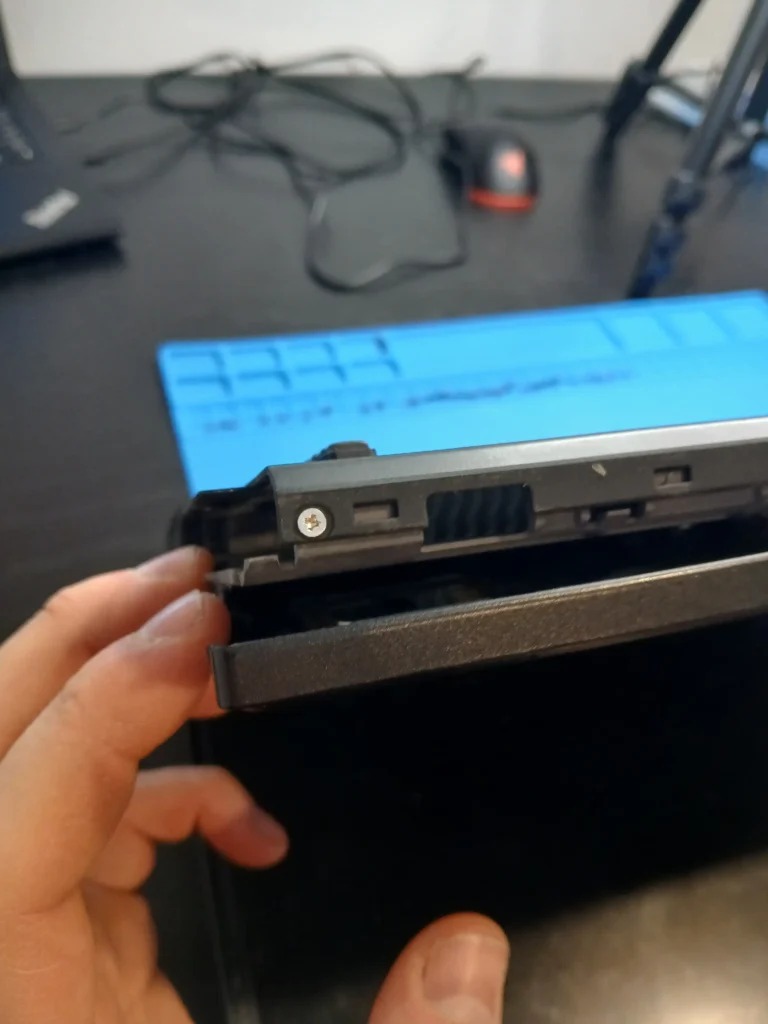
Pry open the casing
Use your plastic pry bar to gently remove the casing, start with the corner and work your way around. Do not pry too hard and do not go too far. Always look to see if there’s a SD card or something in a port blocking before you disassemble it. There might be hidden screw under stickers, rubber parts or under keyboards. If something doesn’t want to come loose, don’t force it. Figure out the proper way to remove it.
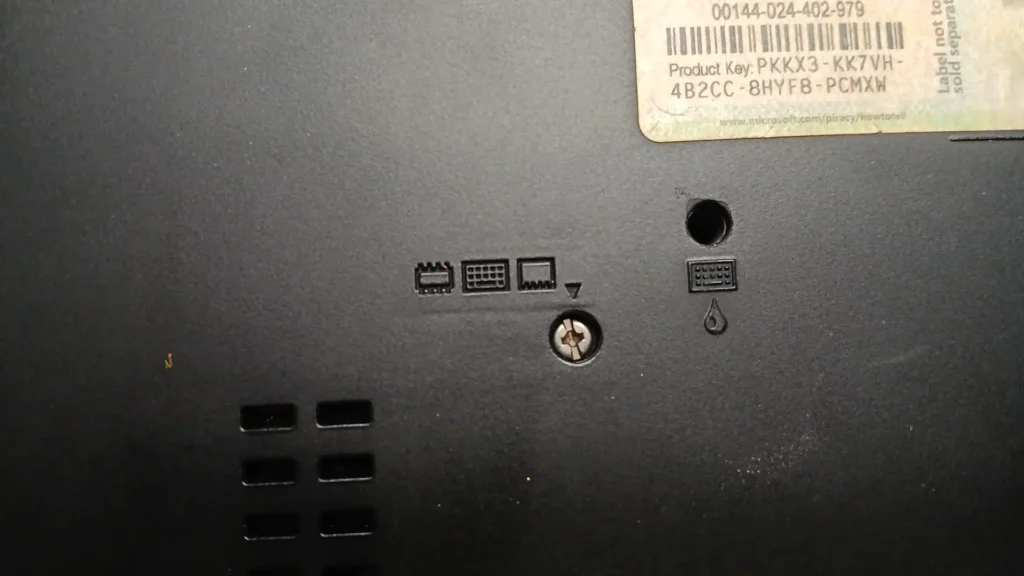
When you flip over the laptop to remove the screw, on some laptop, you will notice some logo. The logo is there to tell you what it is retaining. Example :
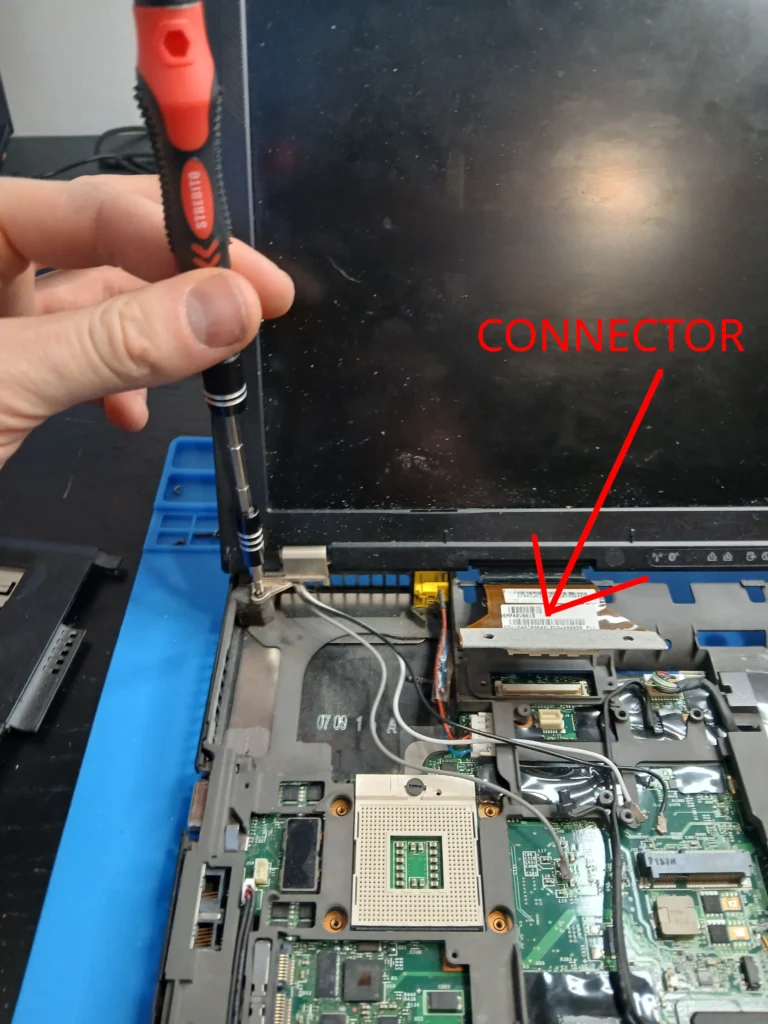
Cable removal procedure
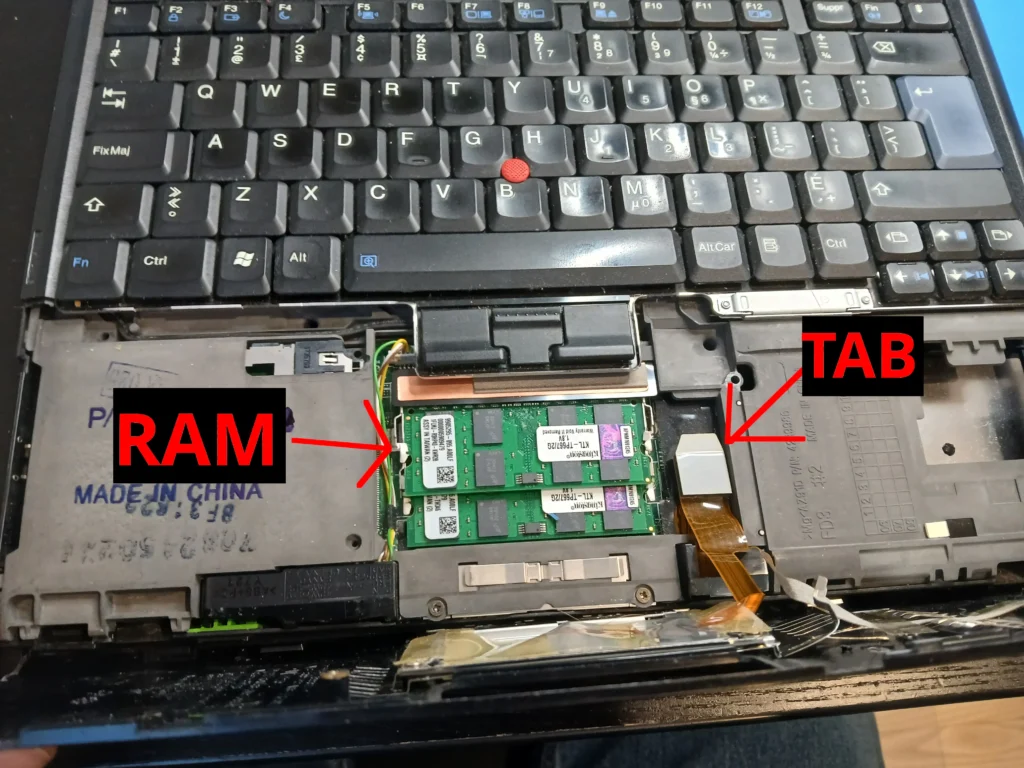
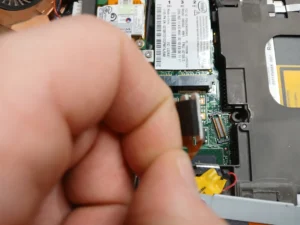
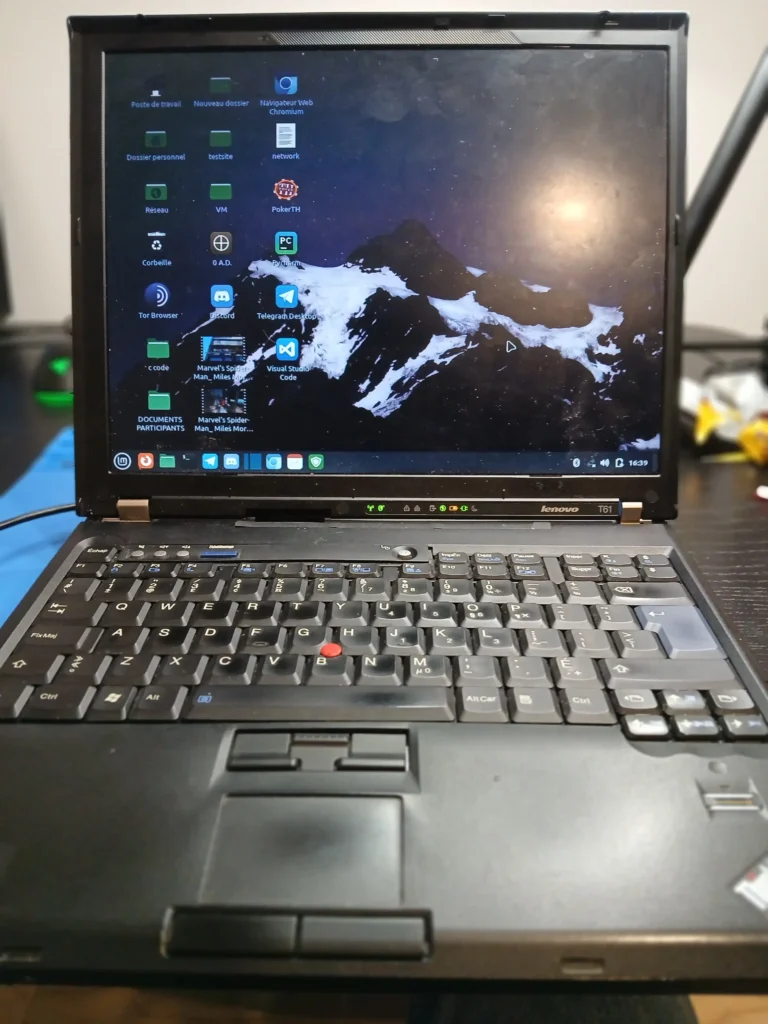
As you gain more experience disassembling laptops, you will notice that there’s a few different connector types. The thing they all have in common is that there will be a “tab” to pull on the connector to disconnect it. The laptop that I’m using for this demonstration is a Lenovo ThinkPad T61, which is pretty old. The newer connectors have a white plastic tab that can be lifted or pulled.
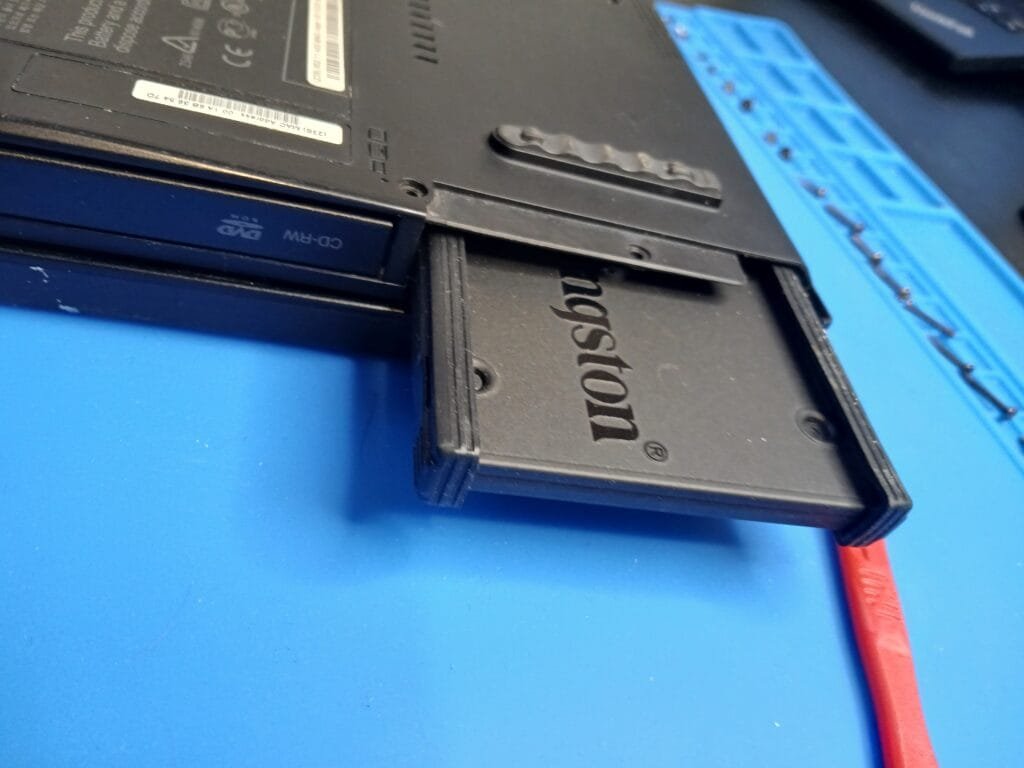
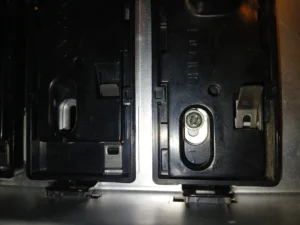
Hard Drive Removal
In this laptop, you have to unscrew a screw on the side of the computer and simply pull on the hard drive latch to release it. It is connected via SATA.
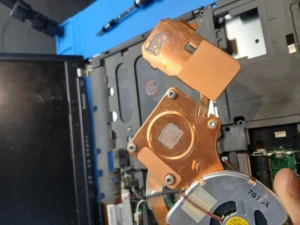
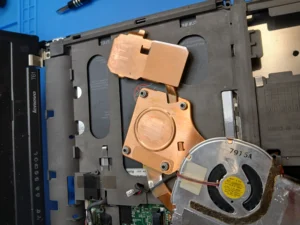
Fan/Cooling System Removal
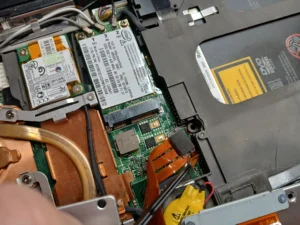
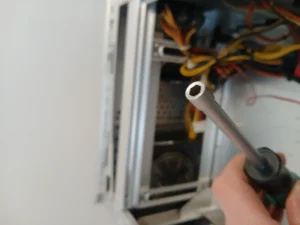
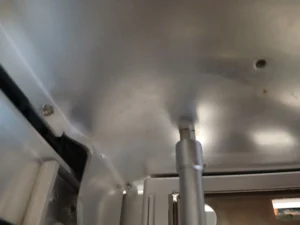
To remove the cooling system, you should first remove the WI-FI card and Bluetooth card. Disconnect the 3 cables on the network card. Then unscrew the two screw holding it to the motherboard. Do the same for the Bluetooth card. Once this is done, you can then remove the 6 screws holding the CPU fan. Gently pull up and then remove the cooling system.
Removal of the network card connectors :
When the connectors and screws are removed, the network card will pop up like the RAM. Slide it out of the socket gently and put it aside.
Disconnect CPU Fan :
Cooling system screws :
Removing The Cooling System :
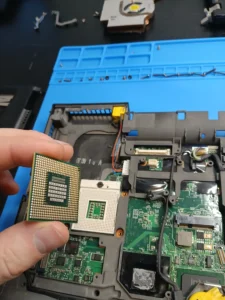
CPU Removal
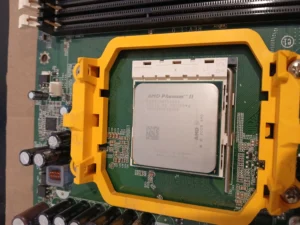
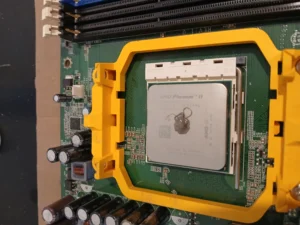
When removing a CPU, NEVER!! TOUCH THE GOLD CONNECTOR. ALWAYS hold it by its side. It is extremely fragile and touching the connectors could leave oil residue or bend it. Be careful!!
Unlocking The CPU :
Screen removal
To remove the screen on this laptop, it is pretty simple. Unscrew the two screws holding the plastic cover. Disconnect the screen connector and then unscrew the two screws, one to the left and one to the right. Pull the screen gently.
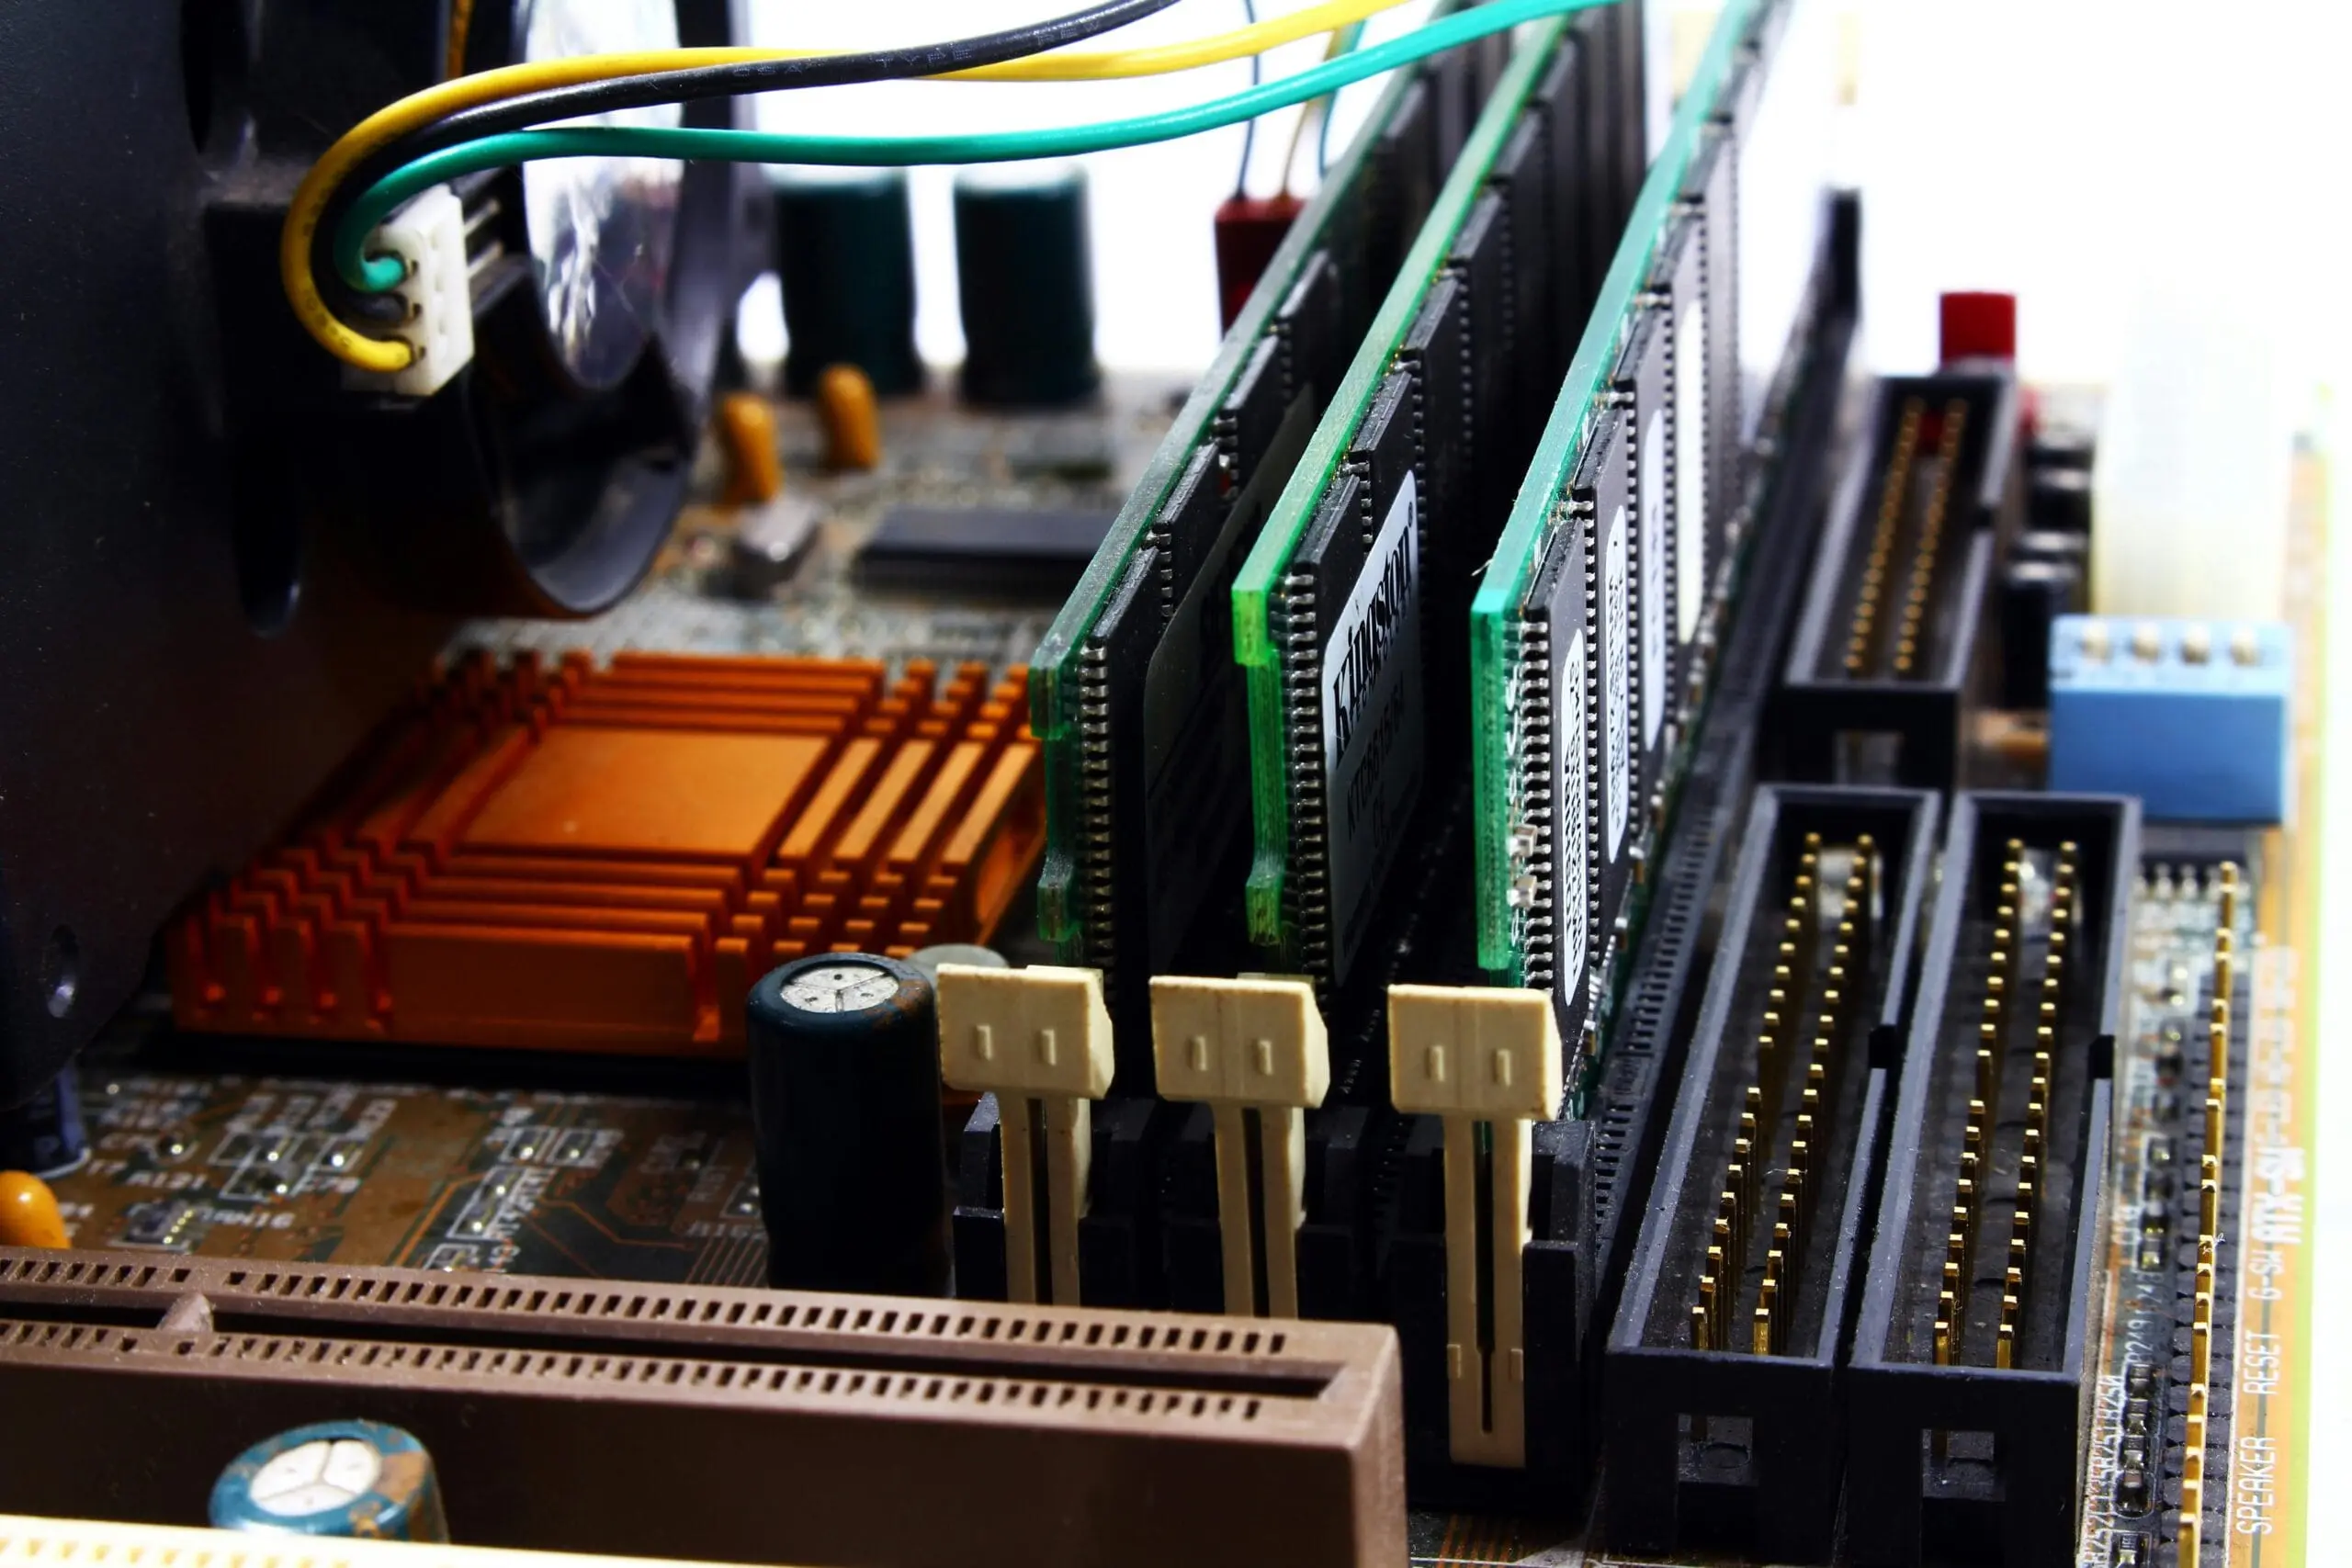
RAM Removal
To remove the RAM, simply unclip from both side. It will automatically pop up. Gently pull the RAM and set it aside.
Motherboard removal
To remove the motherboard, all the screws must be removed. To have an easier time, you should remove the screen.
Here’s What it Looks Like at The End
Cleaning and thermal paste
Removing Dust and Debris
To remove dust and debris, you can use the air can or an electric fan. Make sure that the cooling system is not blocked by any hair, dust, or debris.
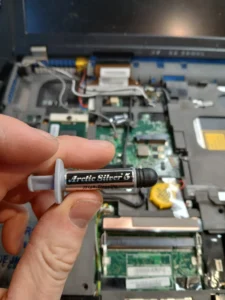
What is Thermal Paste?
Thermal paste is a type of paste that help conduct the heat from the CPU to the cooling system to make it more efficient. If you put too much thermal paste or too little, the CPU might overheat. Once you are done reassembling the computer, always check the CPU temperature to make sure that you did everything right.
Applying Thermal Paste
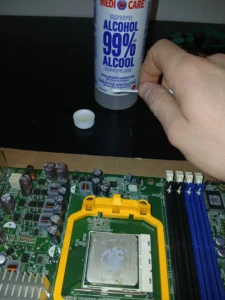
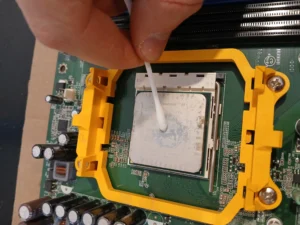
Before you apply thermal paste to the CPU you must clean it using isopropyl, anything over 90% is good. It is safe for electronics and it vaporizes quickly.
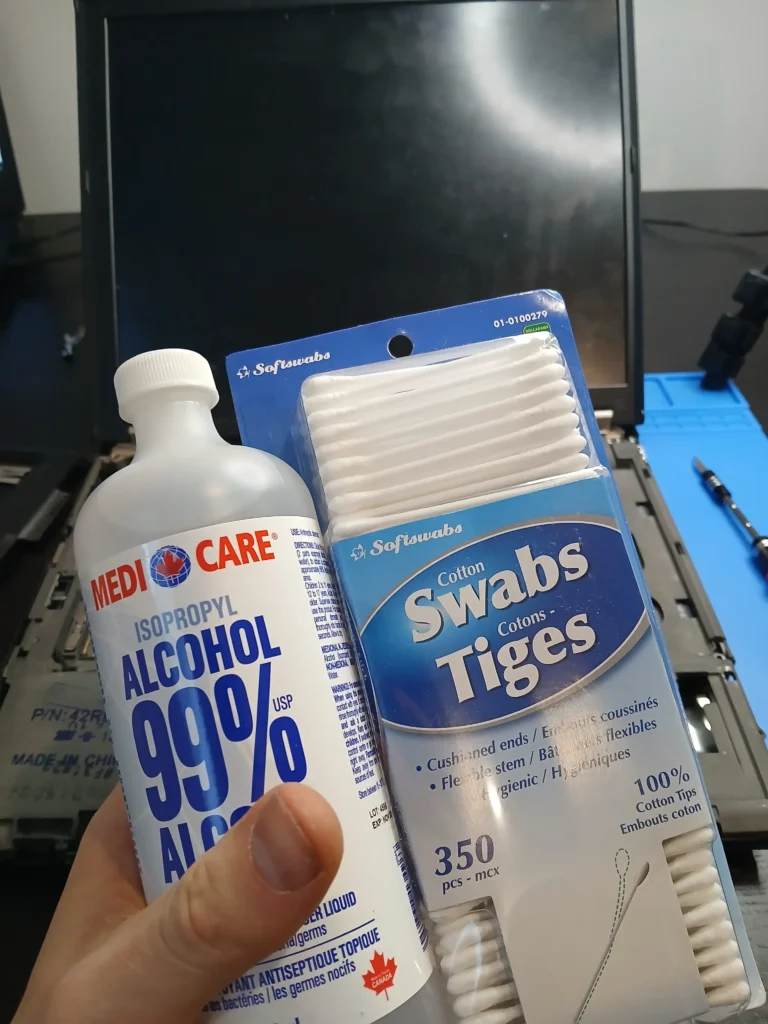
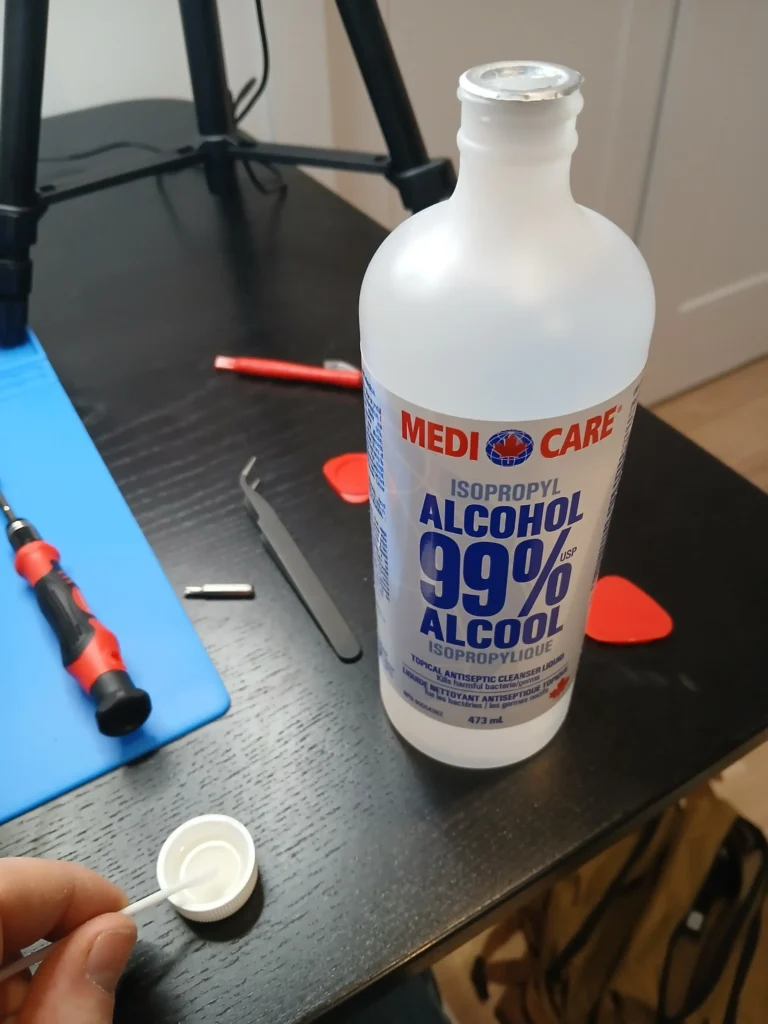
What I like to do is pour the isopropyl in the cap and use a cotton swab to clean the CPU.
How to Clean?
To clean the CPU, simply scrub using the cotton swab. Make it shiny! Like the pictures below.
Time to Apply the Paste!
Go back to the PC section (ignore if you didn’t read yet)
To apply thermal paste, simply put a small dot in the middle of the CPU. There exist multiple ways to apply thermal paste, but the improvement is minimal. Make it simple for yourself, but always verify afterwards to make sure. Better be safe than sorry!

Corrosion
If you see corrosion on the motherboard, you can always try to wash it off with isopropyl. Result may vary. I saved a few computers like that, but you shouldn’t try anything else unless it is a rescue mission. Don’t fix something that is already working because you might damage it more than you wanted. Always inform the customer if you see something unusual and tell them to make a backup in case the motherboard fail. Use your judgment wisely.
Reassembly Of the Laptop
Reinstall the CPU & Cooling System
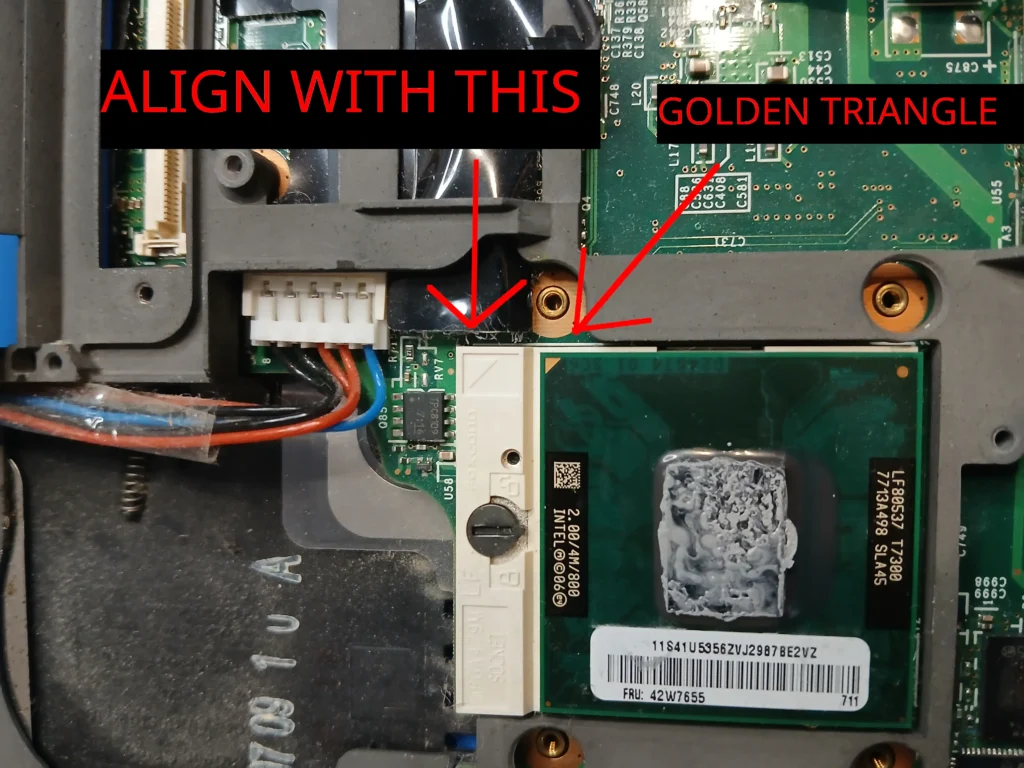
If you look closely on the CPU socket, you will see a triangle, you have to align that triangle with the golden triangle on the CPU. If you put it on the wrong side, you will break the CPU. Be careful!!
Don’t forget to lock the CPU
On the cooling system, you will notice that there is a number 4. You have to screw the screws in a specific order. You can check in the manual of the manufacturer to see what is the proper order. Always make sure that you do not over tighten! Failure to follow this procedure might result in an overheating CPU.
Do not forget to reconnect the CPU fan cable!
Reinstall the RAM
To reinstall the RAM, place them in their slot, but be careful to align the hole with the notch inside the socket.
Reinstall the Network Card & Bluetooth
This is pretty simple, reconnect the cards if they have a cable that’s linking them to the motherboard and then insert them into their socket. Once this is done, reinstall the screws.
Reinstall the Screen
The same way you took it out. Reconnect the cable and reinstall the screws.
Triple Checks!
Make sure that you reconnected all the cables and that there are no missing screws. Verify that no cable is under something it shouldn’t.
Before you close everything
You can reinstall the casing, of the keyboard and everything in between. But before you close and reinstall all the screws, you should test that the system is working properly. Test the keyboard speaker, touchpad and all the other functions.
Final result
Congratulations!! You did it. You changed the thermal paste and cleaned the computer.
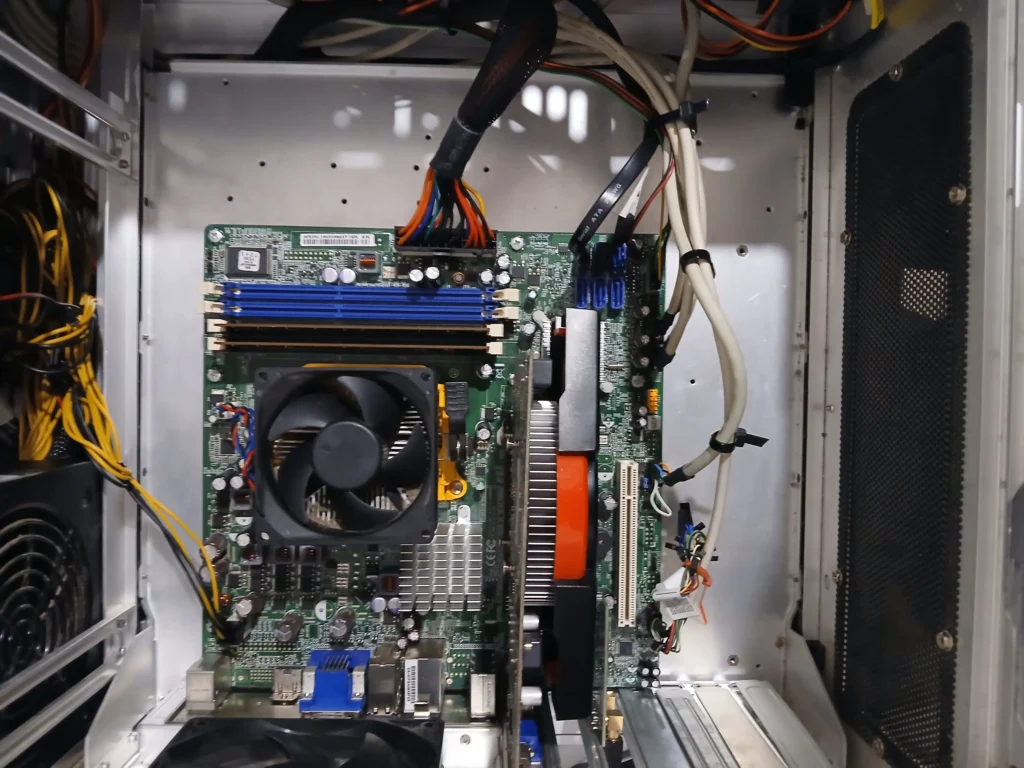
Tower Disassembly
Tips to follow before disassembly
Before you try to disassemble your computer, make sure that you do not wear clothes that conduct static electricity. You can touch something metallic like a doorknob to be sure to discharge static electricity as well.
Disconnecting the Power Source
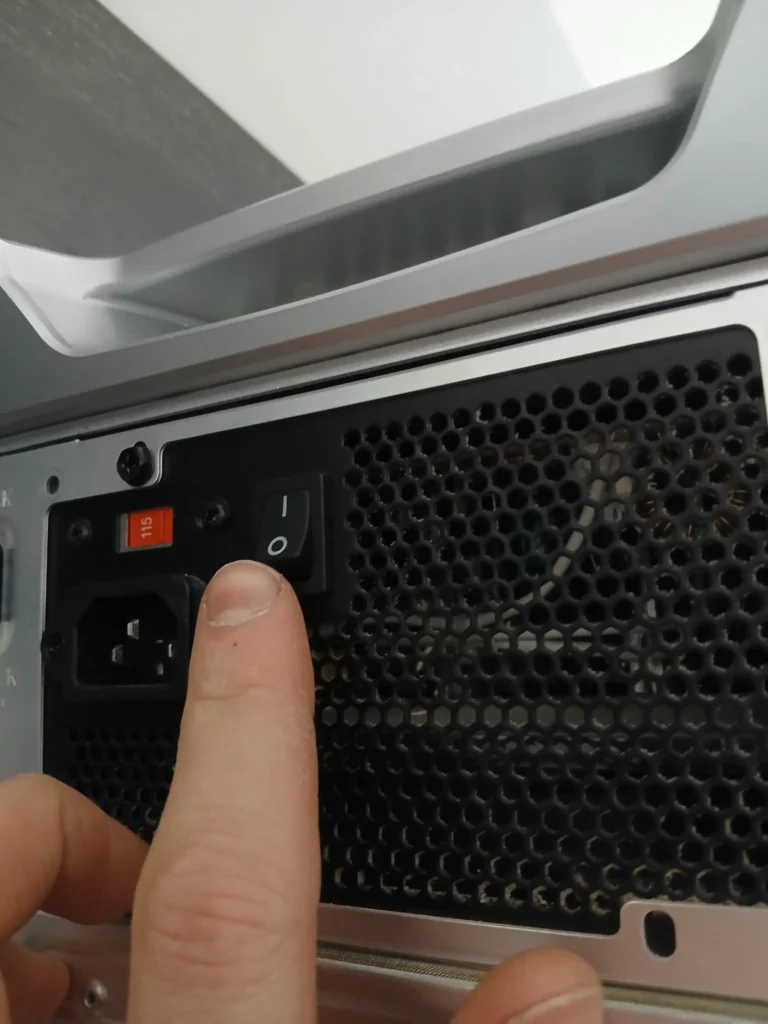
First, disconnect all power source. Make sure that the power supply is set to off and click on the power button and hold it there 30 seconds. Doing this will discharge all the remaining electricity that might be stored in the motherboard (except the CMOS Battery, do not remove it).
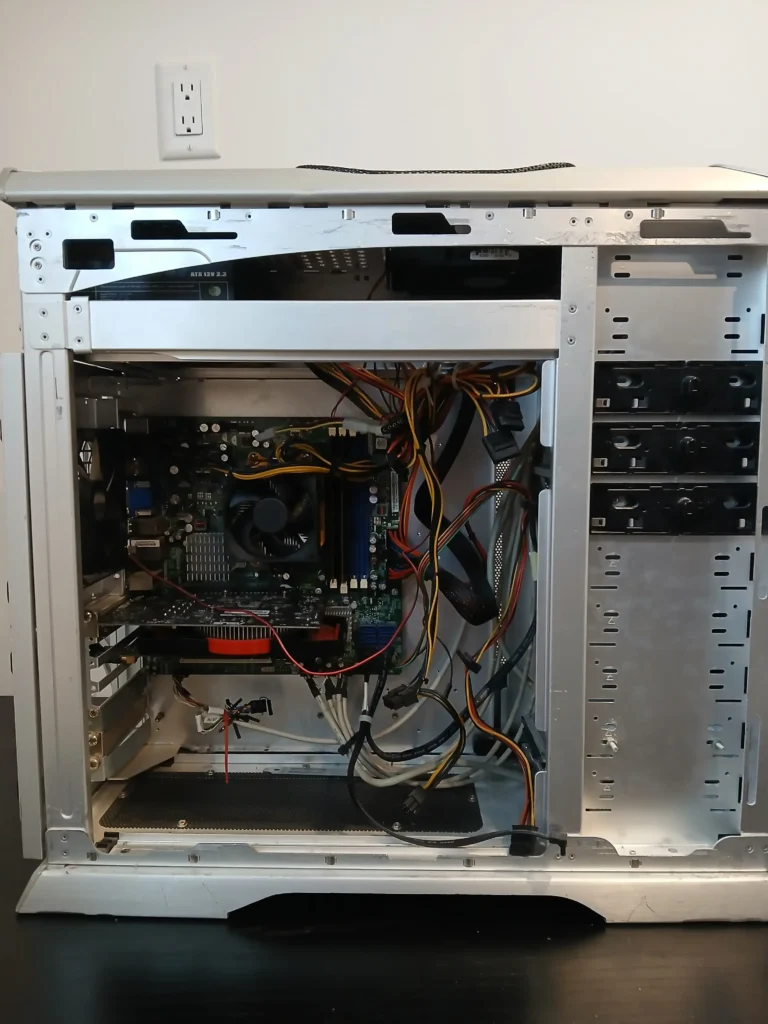
Opening the Case
Opening a desktop pc case is really simple. Look at the back of the computer, there should be 4 screws on the four corner of the PC case. Unscrew them all and then hold the panel with your hand and slide it backward.
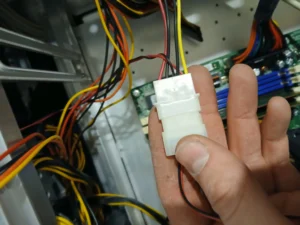
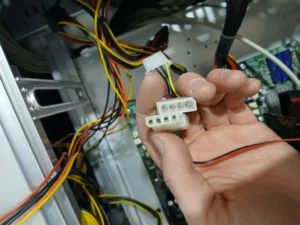
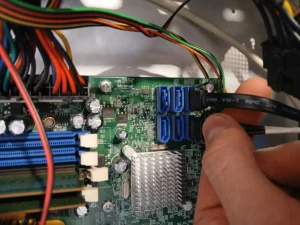
Cable removal procedure
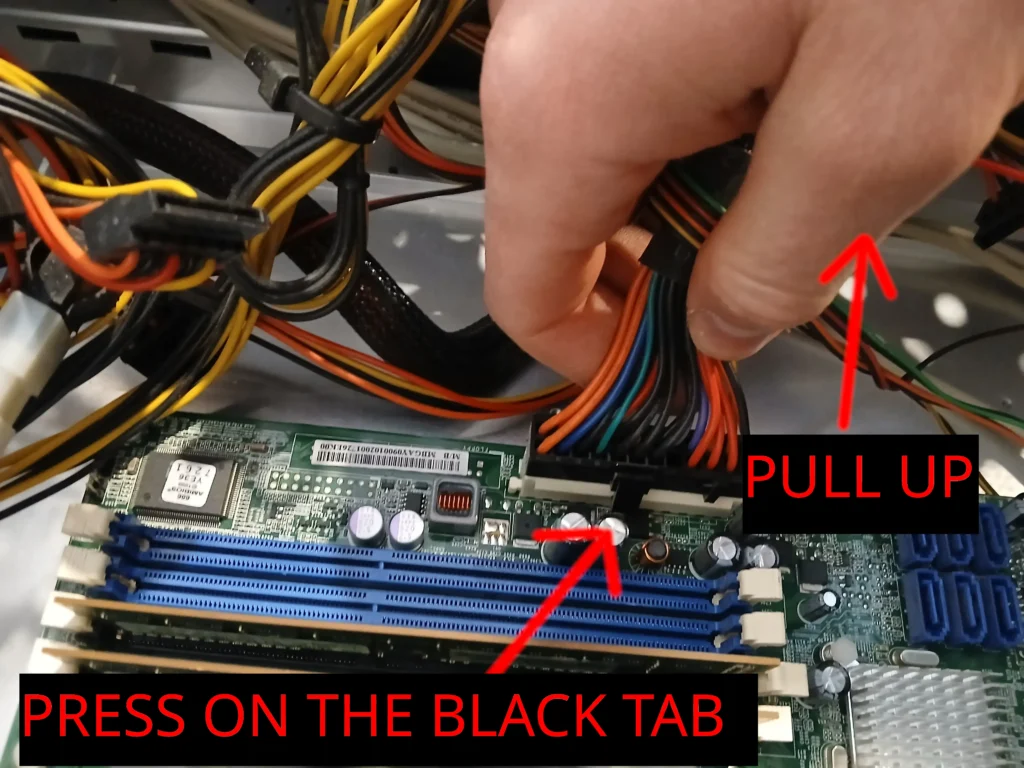
Once you have opened the PC, you will see a bunch of cables. Make sure to always hold down the motherboard if you pull hard on some cable. Disconnect all cables.

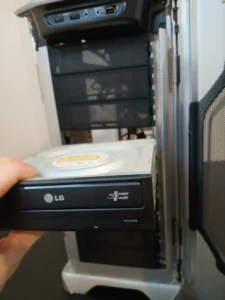
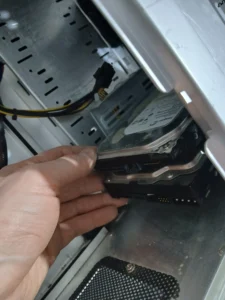
Hard Drive/CD DVD removal
At this step, you should’ve already removed the SATA cables and the power cable from the power supply. The only thing left to do is to see what is holding the hard drive to the inside of the computer case. Usually it’s between 2 screws or more. Unscrew them and pull out the hard drive.

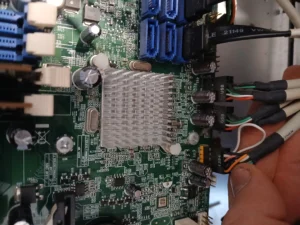
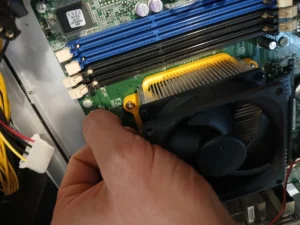
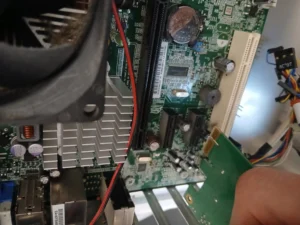
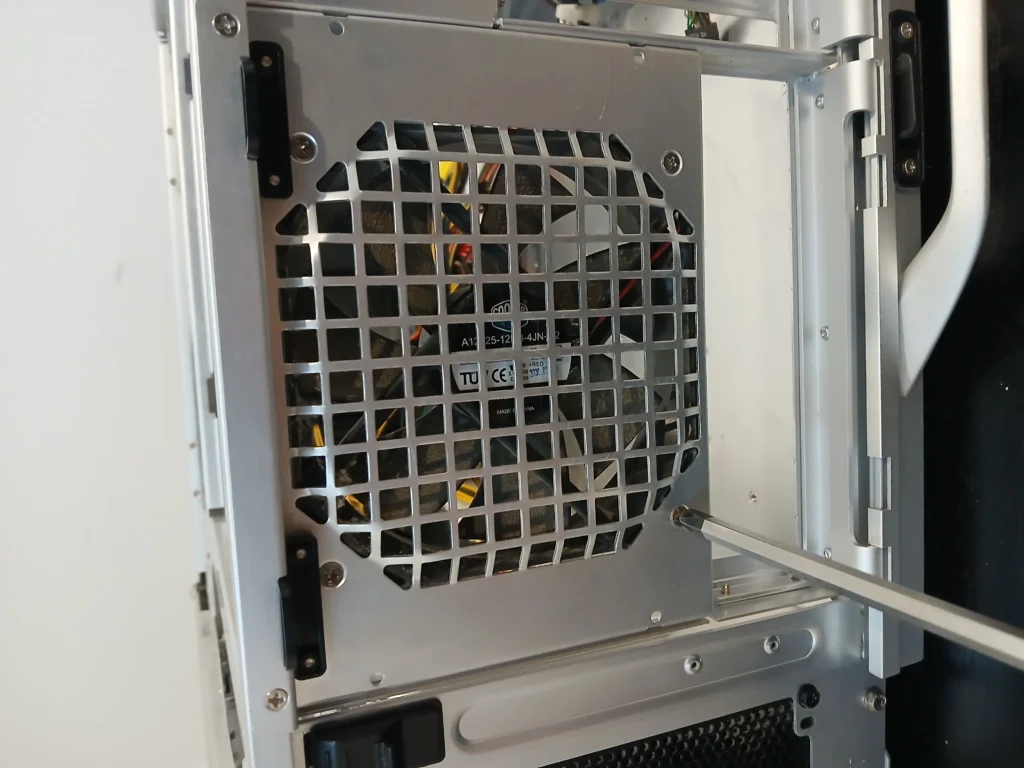
Fan/Cooling system removal
This one is pretty simple. Locate the 4 screws at the back/top/bottom of the computer and unscrew them. Make sure that you check on which direction you took the fan from. It is important for the airflow.
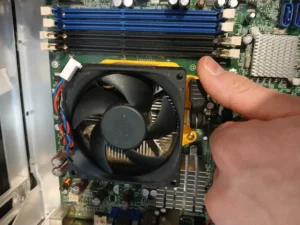
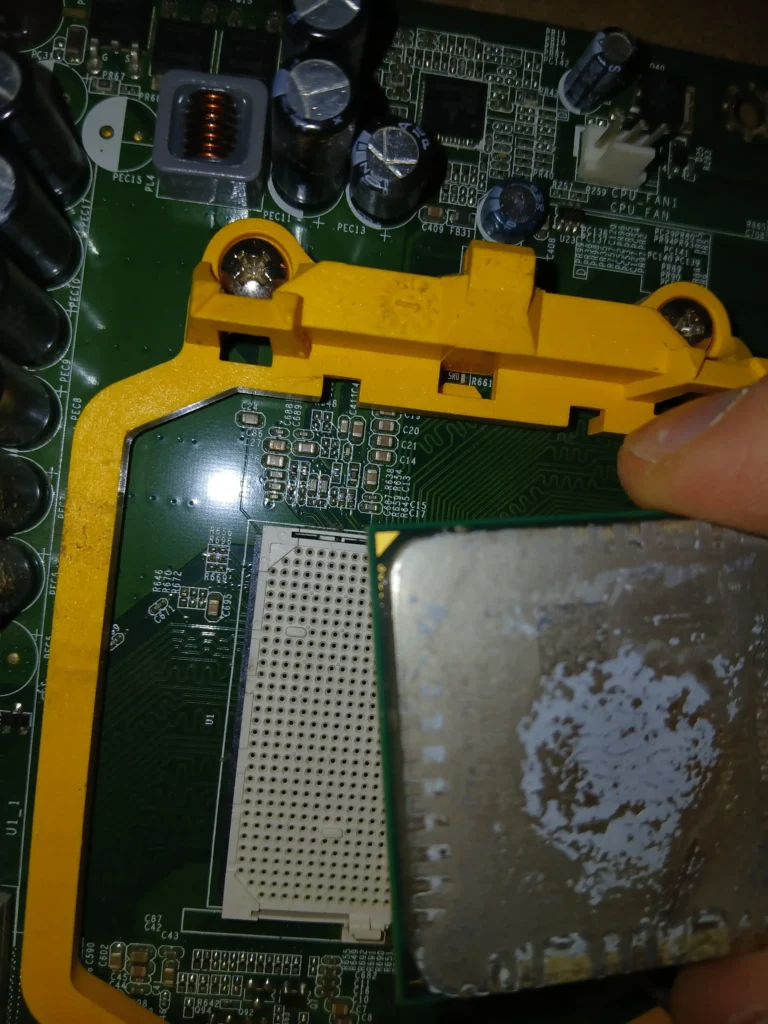
CPU Removal
To remove the CPU, you must first remove the CPU cooler. There’s multiple type of coolers on some of them you must push and turn the 4 screws holding it on. Another model like the one I’m using in the example is a latch. If you have any doubt on how to remove it, you can search on the internet using the model of the motherboard to find which cooler is compatible with it and check a video on how to remove it.
Cooler Removal

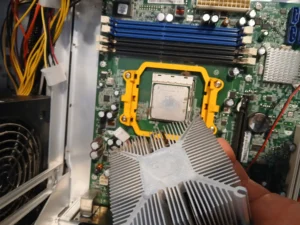
CPU Removal
Pull the latch outward and up. It will release the CPU as shown below :
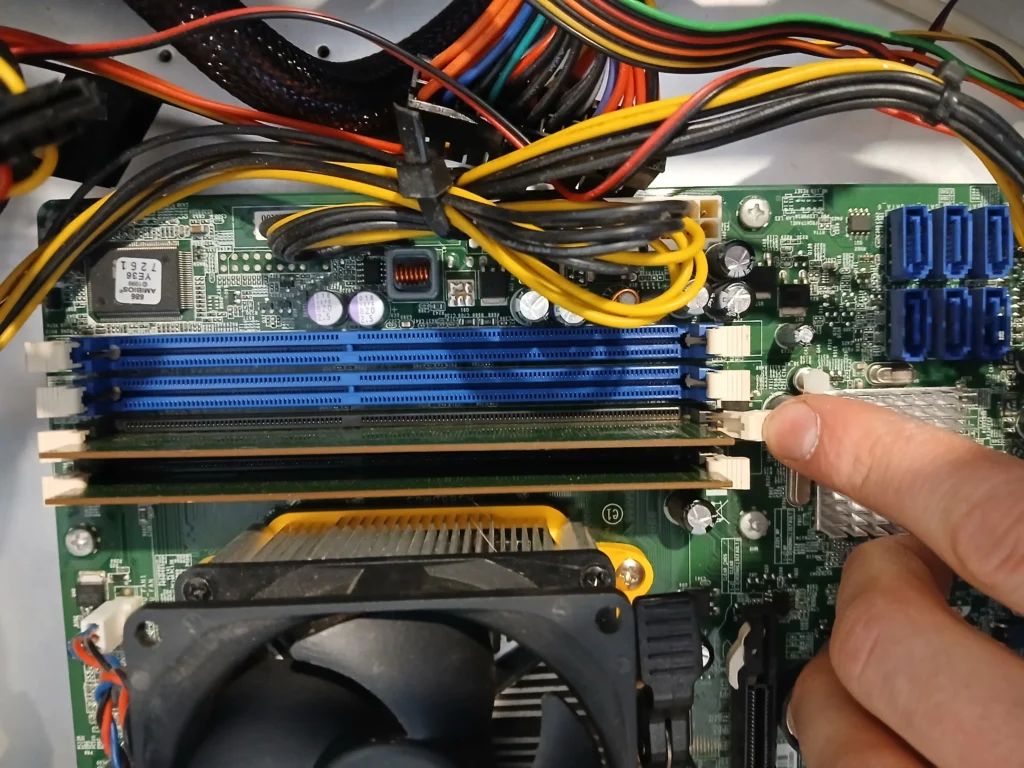
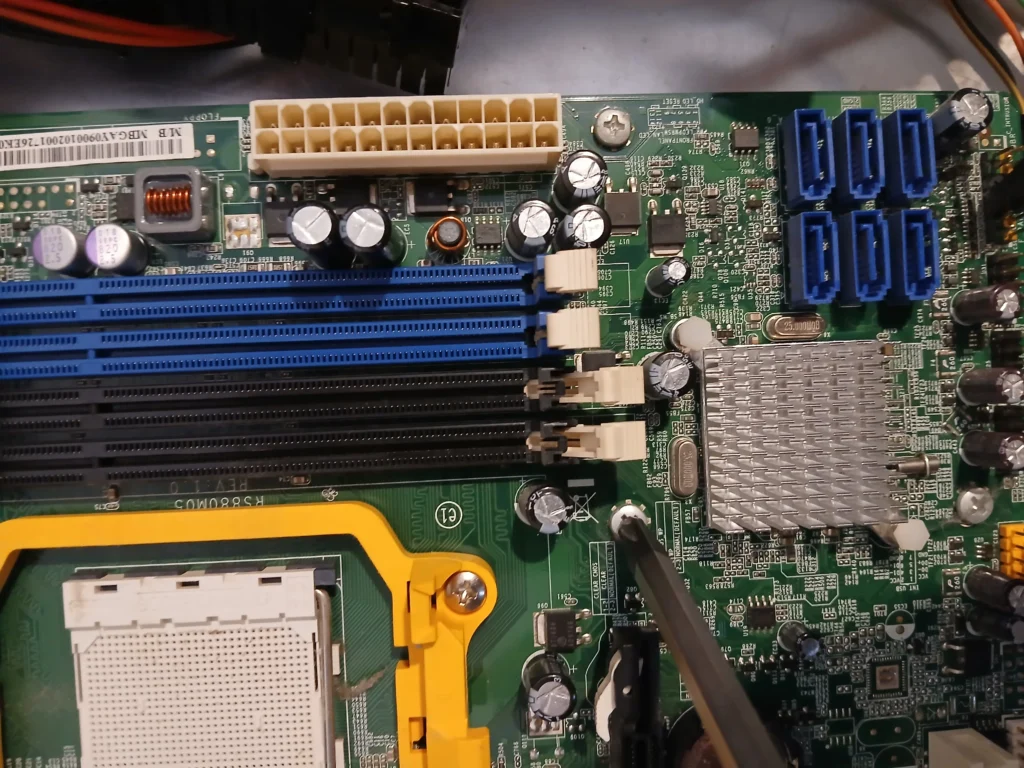
RAM Removal
Removing the RAM is really simple. Locate the latch on both side of the ram and simply unclip it by pushing down and toward the outside of the case. You do not need to push really hard.

Motherboard removal
To remove the motherboard, you need to locate the screws that are holding it down. Once you did that, you can, unscrew them. Pull on the right gently and then pull up.
Removing the I/O Shield
To remove the I/O Shield just push on it and it will pop out.
Removing Dust and Debris
To remove dust and debris, you can use the same steps as the laptop section. Just use an air can and remove all the dust.
Tower Reassembly
Installing the CPU in the Motherboard
If you did the laptop part first, you will have noticed that you needed to align the golden triangle with the triangle on the motherboard socket. You need to do the same here too! Be extremely careful with the CPU! Hold it by its side and do not force anything, do not press on it when you insert it inside the motherboard. Do not touch under the CPU, do not touch any of the golden pins.
Apply Thermal Paste
Before applying the thermal paste, you must first remove the old one using isopropyl and cotton swab.
Then apply thermal paste like described in the laptop section.
Installing the CPU Cooler/ RAM
You can now Install the CPU cooler on the CPU. Again do not press too hard and make sure you are aligned with the 4 holes on the motherboard or depending on the cooler you might have to align some latch too like in this example.
Power Supply
Perfect! Now you can install the power supply. Simply put it inside it’s hole and screw the 4 screws at the back of the PC Case. Once you are done, you can toss all the cable on the outside of the computer, it will give us more space for the next steps.
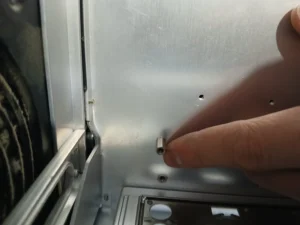
Installing the Standoffs
Before you install the standoffs, you must make sure that you are using the right screws. Pick the screws you plan on using to install the motherboard and test each and every single one. Screw them inside the standoffs.
Now, you can install the standoffs inside the computer case, you can use the motherboard and look through the hole for reference. You need to have a standoff for each and every hole on the motherboard, no more, no less. If there’s one that is installed incorrectly, it will make a short and can kill the motherboard. Be careful and line them up correctly.
Installing the I/O shield
Before installing the motherboard, we must install the I/O shield. This metal part is crucial to keep dust and debris on the outside of the computer. One of my friend short his PC once because he didn’t install this part. When he tried to connect a small Wi-Fi adapter, the adapter flew inside the case, touched the motherboard while it was running and killed the motherboard. That was a $500 mistake right there.
Installing the Motherboard
Because of the I/O shield, the motherboard will be a little springy. You must align the ports of the motherboard inside the I/O shield. Failure to do so might cause a short because some I/O shield have pins that might insert themselves inside a USB port, for example. Push on the motherboard and install a screw in the middle. Once you did that, look inside each port to make sure that nothing metallic inserted itself there, and then screw the remaining screws.
Install the Harddrive CD/DVD Drive
For this step, all you need to do is to slide the CD/DVD drive inside it’s slot and screw all the required screws to make sure that it is held correctly.
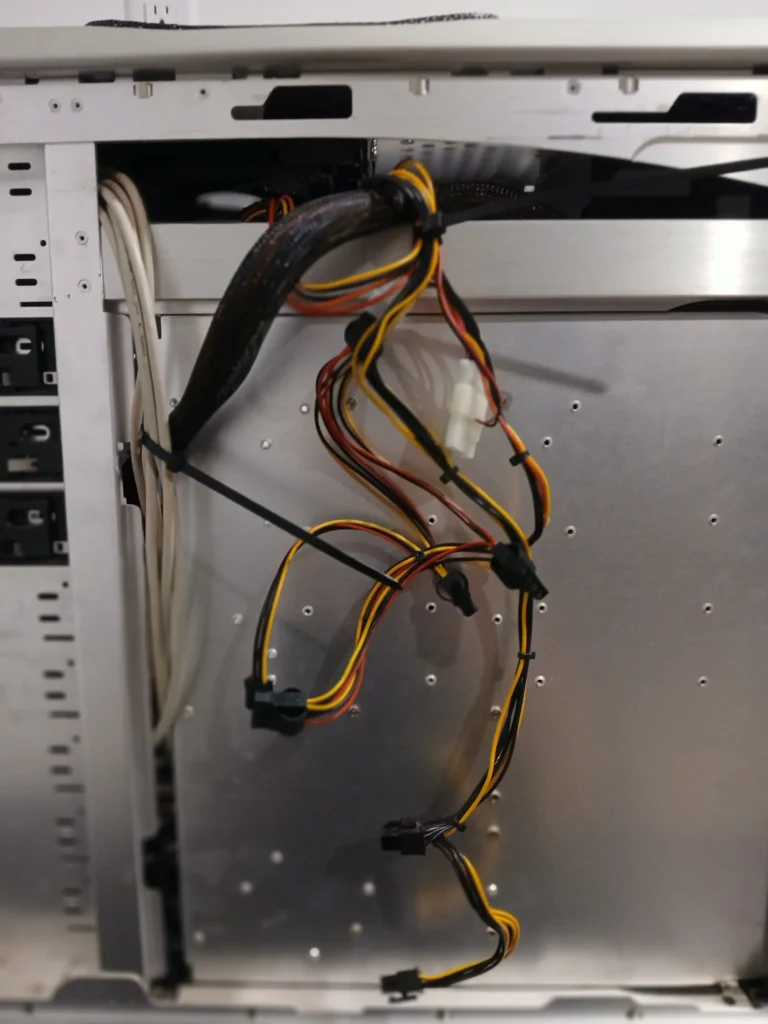
Cable Management Part 1
Before going further, you might notice in your case that there are a lot of holes that you can slide cables through. This is an option to help you manage cable inside the computer. It can make your computer more beautiful and declutter it. Try to hide as much cable as you can by sliding it on the backside of the computer and rerouting them so we don’t see them. Make sure that you have enough length to reach the connection on the motherboard and HDD/CD Drive.
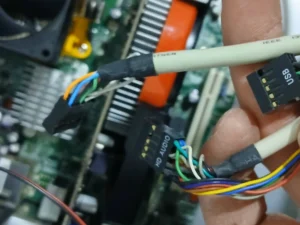
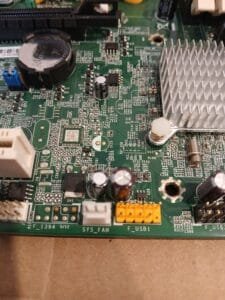
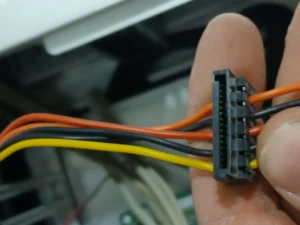
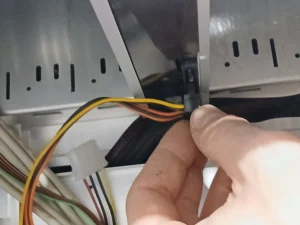
Connect the Case Power Cable /USB/HD Audio
Before installing anything else, we will connect the most annoying cable known to man. You will understand why in a few seconds.
Sometimes, you can find the plan on the internet to connect the front panel cable. In my case this time I was unable to find it. So I looked on the motherboard and used the plan that is printed there.
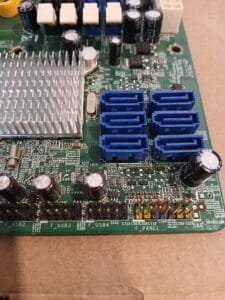
Connect SATA Cable & Power Cable
Connect the SATA & power cable to your hard drive, CD/DVD drive.
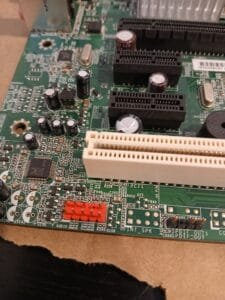
Install the GPU & Extra Cards
We are almost there, install any Extra card or GPU by inserting them inside their respective PCI slot. Do not forget to reinstall the screws to properly secure the GPU and other PCI cards.
Cable Management Part 2
This is where you check if everything can properly connect to its destination. Make sure that no cable touch anything that would be hot or turning, such as a fan. Tie everything together using Velcros or zip tie.
Install both Panels
Last step! Reinstall the panels by sliding them on the case. If you look closely, you will see that there’s metal notch in the case and align the panel there and slide them, might require a bit of force with new cases. Reinstall the screws at the back of your PC.
Congratulation!
Well done! You did it, you’ve learned how to disassemble and reassemble a computer. You are making good progress!